 |
|||
|
|
|||
|
Page Title:
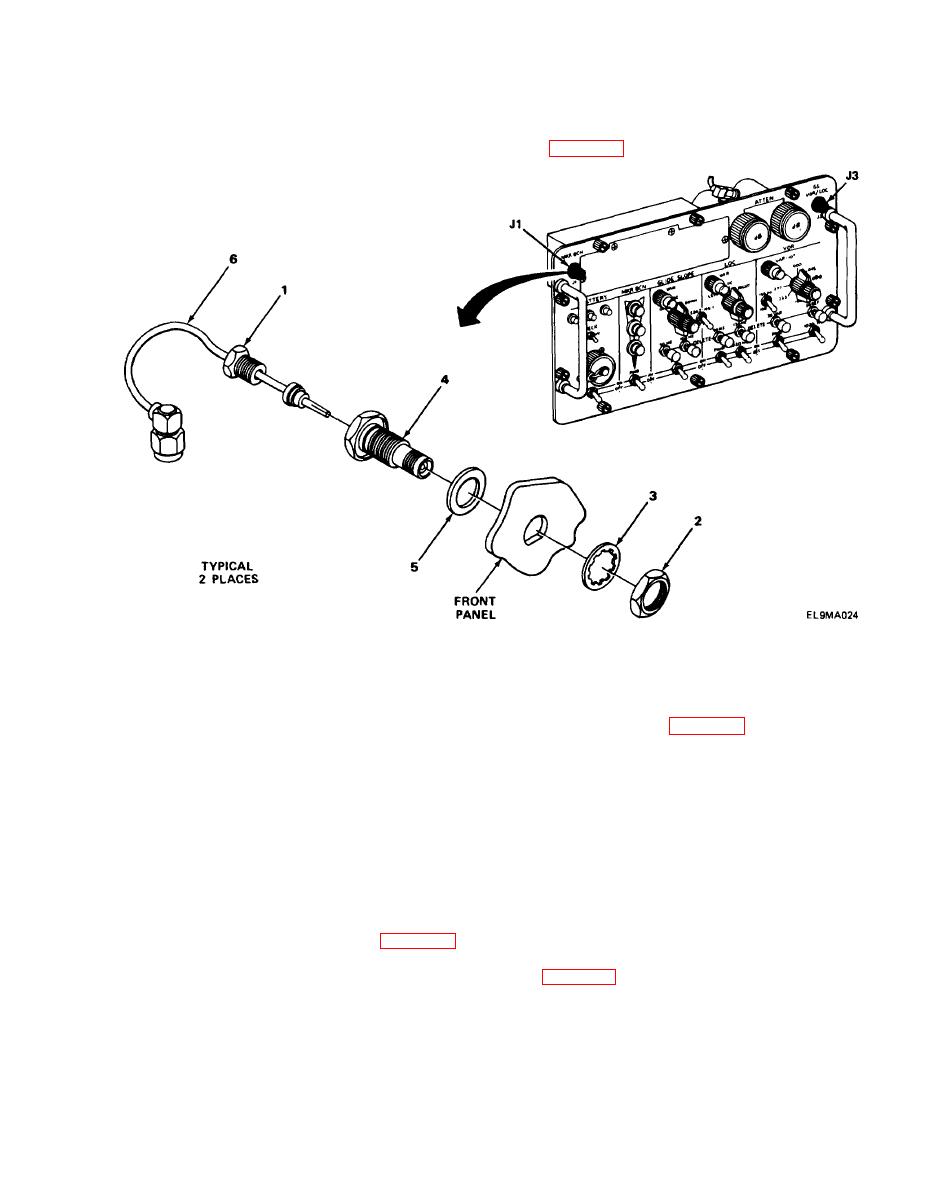
ANTENNA JACK J1 AND J3 REPLACEMENT. |
|
||
| ||||||||||
|
|
 TM 11-6625-2976-40
2-21. ANTENNA JACK J1 AND J3 REPLACEMENT.
MATERIALS/PARTS: Jack, antenna, electrical, J1 and J3
PRELIMINARY PROCEDURE: Remove A6 and A8 assembly (para 2-19).
REMOVAL
NOTE
For removal of jack J1, battery case must first be removed (para 2-23).
Steps given are typical for both J1 and J3 antenna jacks.
1. Using wrench, remove wire retaining nut (1), jack retaining nut (2), and lockwasher(3).
2. Remove jack (4) and O-ring (5).
INSTALLATION
1. Position jack (4) and O-ring (5) in front panel, and install lockwasher (3) and jack retaining
nut (2). Using wrench, tighten jack retaining nut (2).
2. Install wire retaining nut (1) and, using wrench, tighten.
3. For jack J1, install battery case (para 2-23).
FOLLOW-ON MAINTENANCE: Install A6 and A8 assembly (para 2-19).
2-65
|
|
Privacy Statement - Press Release - Copyright Information. - Contact Us |
